I was pontificating on home networks setup the other day a response came back: “Patch panel? Switch? CAT6? Keystones? This sounds really complicated!”
It isn’t really that complicated but there are lots of choices on ways to go and some of the ways can be quite expensive. I’d like to walk you through what I did a couple of years ago and is still serving me well.
Wall Outlets
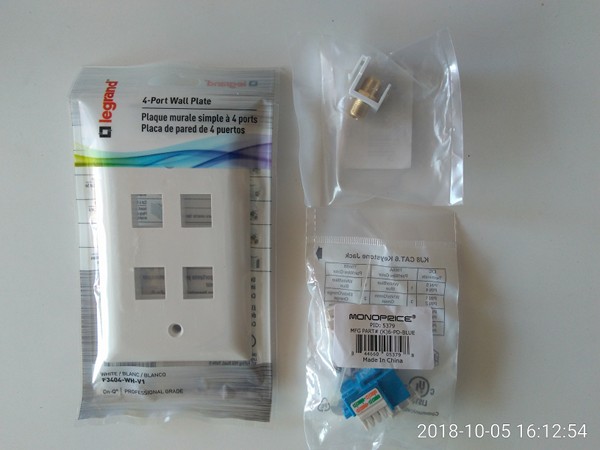
In each location where you might want a TV you will want some coax cable. And each location where you might want to plug in a computer you will want some network jacks. You can get wall plates specific for those but I find it more useful to get a plate that can accept “keystones” which are modular little snap in pieces that come in all varieties. With that I can have one location have, say, one coax and three network outlets.
Network Closet
Current best practice is to “home run” all the cabling from your wall outlets to a central point typically called a “network closet” or maybe a “AV (audio/visual) closet”.
You connect (“terminate”) all the cables to one or more “patch panels”. Now with “patch cords” you can connect any cable to any other cable or device. This makes it easy to reconfigure you house. Maybe move the gaming computer from the family room to the boy’s room and still have it “hard wired” with Ethernet for speed.
In my old house I had a one patch panel for network and another homemade panel with coax bulkhead connectors for a cable/satellite/TV patch panel. In my current house I decided to purchase patch panels that take the same keystones as the wall outlets. This seemed neater and easier than having a whole separate panel for each type of cable.
The network closet is also where you put common equipment like your fibre, cable or DSL modem and your router (if you have one separate from what you Internet Service Provicer (ISP) supplies). If you have a Network Attached Storage (NAS) device, the network closet can be a good place for that too.
Building the Closet
They make in-wall boxes specifically for home networking but everyone I have seen was short on capacity and long on price. You seem to get a lot more “bang for your buck” using commodity 19″ rack mount equipment. But a 19″ racks can take a lot of space and can be expensive too. So I purchased some “L” brackets with the appropriate hole spacing, etc. for making my own rack. And the “rack” itself is simple a wood panel supporting a shelf in my office closet.
As part of the shelf support there is a wood piece on the wall with a number of cutouts for getting cable out of the wall. And I made a removable panel below everything to make it possible to get a drill in to make holes to the crawl space for routing the wires.
I mounted two 24 port keystone patch panels and one 24 port network switch in my “rack”.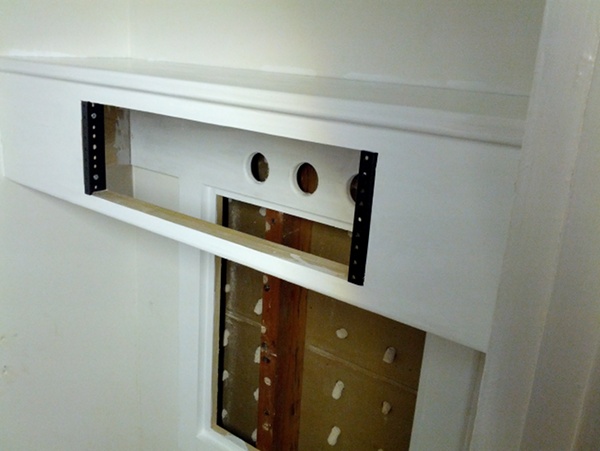
Pulling the Cables
At my old house I started out using “structured cable”, basically just a couple of network cables and a couple of coax cables bound together. The stuff was hard to pull and not as flexible in configuration. Every location would have exactly the same mix of network and coax while I wanted more coax in places with TVs and more network in our two home offices. Eventually I abandoned the structured wire and simply decided to pull what I needed to where I needed it.
In this house I decided that I mostly need network cabling (most of the TV we watch is actually Internet streaming) and that anywhere I pulled network I’d pull it in pairs. So I purchased a bunch of keystones in white and in blue along with a box of white and a box of blue cable. All CAT6 as that was the highest speed classification when I did the work. I used the blue keystones on the blue cable and the white keystones on the white cable. If I was pulling multiple pairs of network cable, then I wrapped the ends in different colored electrical tape so that I could tell the pairs apart. 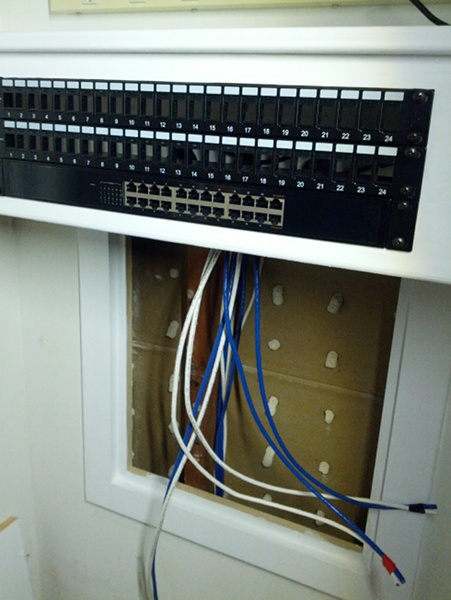
For organization, I reserved the left 10 positions in the two patch panels for cables from the service entrance. And I set a convention of terminating the white network cables on the upper patch panel.
Simple in concept, difficult and dirty in practice, I ran the pairs of cable from each room to the network closet. I terminated and tested each pull as I went mostly so I did not have to think too much about what went where on the panel. If I terminated the cables on location 15 of the patch panels (white on top panel, blue on bottom) then I made a label with “15” on it and put it on the wall plate at the other end.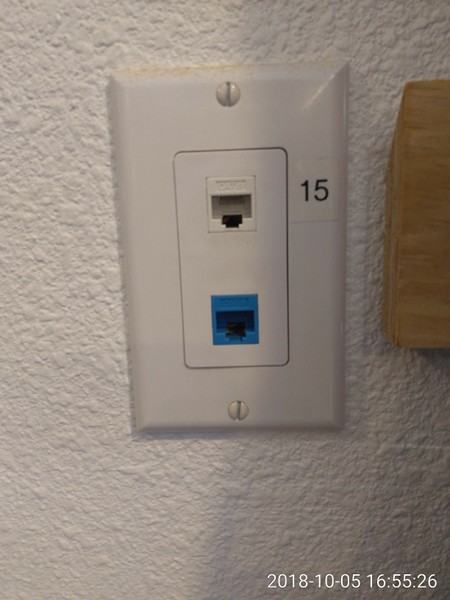
Finishing Up
My cable modem and my Wi-Fi router could be wall mounted. And with some double sided Velcro and footman loops I was able to wall mount my VoIP SIP Analog Terminal Adaptor (ATA). The NAS box can go on the shelf and the UPS for everything goes on the floor. A bunch of stuff has been added later, but the general concept has not changed.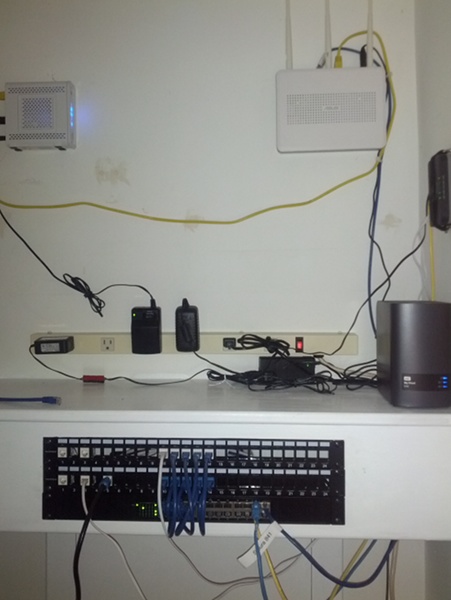
From the bottom going clockwise, we have:
- On the floor (unseen) a UPS that powers the plug strip above the shelf.
- The “rack” with 24 port switch and two 24 port patch panels.
- Top left is the cable modem.
- Top right on the back wall is the Wi-Fi router.
- Barely visible on the far right wall is the Analog Telephone Adaptor (ATA) which provides “land line” telephone service to the house.
- On the shelf on the right is the NAS which provides backup service for our laptop computers and streams our local movie collection to our TV.